Phantom Brush: Integrating a Horror Font into Your Creative Workflow
In the landscape of digital design, typography is rarely just about legibility; it is about setting a tone and establishing an atmosphere instantly. Phantom Brush is a specific tool within this landscape—a bold and terrifying horror brush font designed to bring a raw, dark, and energetic feel to creative projects. However, understanding what a font looks like is only half the process. The real value lies in understanding how to integrate a high-impact asset like Phantom Brush into a structured creative workflow, ensuring that its "rough brush strokes" and "sharp edges" serve a strategic purpose rather than just adding visual noise.
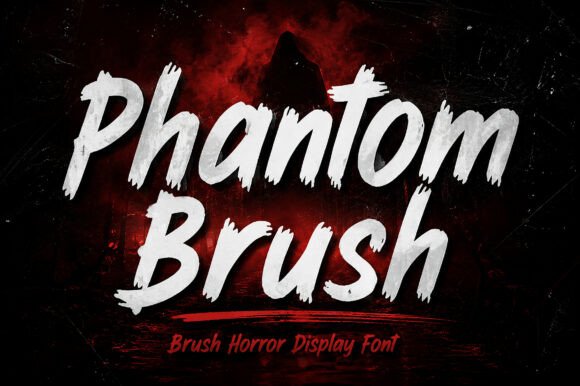
Defining the Asset: The Anatomy of Phantom Brush
Before integrating a new asset into a project, a professional must first assess its technical and aesthetic properties. Phantom Brush features a distinct hand-painted horror aesthetic. Unlike clean sans-serifs or traditional serifs, this font relies on "rugged texture" and "expressive letterforms." This means the font is not designed for body text or data-heavy interfaces; it is designed for headers, titles, and focal points where a "creepy" or "cinematic" vibe is required.
When you download and install Phantom Brush, you are adding a tool that functions best when it needs to grab attention immediately. The visual weight of the font is heavy, mimicking ink or paint that has been applied with force. In a design hierarchy, this places Phantom Brush at the top of the pyramid. It is the anchor for the theme, signaling to the viewer that the content relates to fear, rebellion, or intensity.
Compatibility and Preparation
Integrating Phantom Brush into your existing toolkit requires a check for compatibility. Because it is a display font, it interacts differently with design software compared to standard web fonts. Whether you are using Adobe Photoshop, Illustrator, Canva, or Figma, the font requires high-resolution rendering to maintain its "rough brush strokes" without pixelation.
Preparation involves more than just installation. It involves planning your color palette around the font. Because Phantom Brush carries a "dark" connotation, it pairs well with high-contrast backgrounds—think neon greens on matte black, or blood reds on concrete grey textures. Before starting your project, gather textures and backgrounds that complement the "brush-painted" look. This pre-production step ensures that the font does not look out of place when applied to the canvas.
Strategic Implementation: Where Phantom Brush Fits
The application of Phantom Brush extends across various industries and project types. Its utility is not limited to Halloween flyers; it is a versatile asset for anyone needing a "bold" statement.
For Marketers and Content Creators
If you are a YouTuber or a social media manager, the "click" often depends on the thumbnail. Phantom Brush delivers the necessary visual impact to stop a user from scrolling. In this workflow, the font is used after the video or content is produced but before publication.
- Thumbnail Design: Use the font to create a single, powerful keyword that summarizes the content. The "sharp edges" cut through the noise of a busy feed.
- Merchandise: For entrepreneurs selling apparel, the "rebellious" nature of the font translates well to T-shirts and hoodies. Here, the font is the primary asset, often requiring less supporting graphics because the typography itself carries the design.
For Event Planners and Publishers
In the context of event planning, such as Halloween parties or escape rooms, Phantom Brush serves a functional role in wayfinding and atmosphere building.
- Book Covers: For authors in the horror or thriller genre, the cover is a promise to the reader. Using Phantom Brush signals the genre immediately, managing reader expectations before they read the synopsis.
- Gaming Graphics: In the gaming industry, UI/UX designers often use stylized fonts for logos and level headers to maintain immersion. Phantom Brush fits perfectly into "dark fantasy" or "survival horror" interfaces.
Workflow Integration: From Concept to Execution
Integrating a specialized font like Phantom Brush requires a shift in the standard design process. Usually, designers might select a font at the end of a project. However, with a font that carries such a strong "horror aesthetic," it is often more effective to build the design around the typography.
Step 1: The Typographic Foundation
Start your layout by placing the headline using Phantom Brush. Observe how the "rugged texture" interacts with the negative space of your canvas. Because the font is expressive, you may find that you need less imagery than usual. Let the letters do the heavy lifting. If the text feels too heavy, consider using a distressed sans-serif for sub-headings to provide visual relief without breaking the dark theme.
Step 2: Layering and Texture
A "hand-painted" font rarely looks its best on a flat, solid color. To maximize the potential of Phantom Brush, apply texture overlays. This could be grunge paper, concrete, or splatter effects. This process mimics the physical reality of brush painting, making the digital design feel tangible. In Photoshop, this might involve using "Multiply" or "Overlay" blending modes to merge the font with the background seamlessly.
Step 3: Color Application and Hierarchy
When applying color, consider the psychology of horror. While black and white are staples, introducing a singular accent color can guide the viewer's eye. For example, if you are designing a "horror movie poster," you might color the main title in Phantom Brush using a deep crimson, while leaving supporting text in a desaturated grey. This maintains the hierarchy and ensures the "bold" impact of the font is not diluted.
Practical Observations and Quality Control
As with any tool, there are best practices for quality control. The energy of Phantom Brush can be overwhelming if used excessively.
- Legibility Check: Always step back and view your design at the size it will be consumed. A YouTube thumbnail is viewed on a small mobile screen; a poster is viewed from a distance. Ensure the "sharp edges" are readable and do not blur into a blob of black ink.
- Spacing: Horror fonts often have tight kerning (letter spacing) by default to create a claustrophobic feel. However, for readability, you may need to manually adjust the tracking. Use your software’s character panel to open up the letters slightly if they overlap in a way that obscures the word.
- Contextual Appropriateness: Not every project needs a "terrifying" font. Use Phantom Brush specifically when the goal is to evoke a visceral reaction. Using it for a corporate wellness newsletter, for example, would create a disconnect with the audience.
Long-Term Use and Brand Consistency
For freelancers and small business owners, building a recognizable brand requires consistency. If your brand identity is rooted in the gaming, horror, or alternative lifestyle niches, Phantom Brush can become a staple of your visual identity.
However, to ensure longevity, avoid "trend fatigue." Trends in typography change, but a classic brush style generally holds up well over time. To future-proof your designs, pair Phantom Brush with a timeless serif or sans-serif for body text. This balances the "energetic" nature of the brush font with the stability of traditional typography.
Furthermore, consider the licensing and usage rights for commercial projects. Ensure that your license covers merchandise if you plan to sell products featuring the font. Proper organization of your font library—including version control for assets like Phantom Brush—prevents workflow bottlenecks later in the project lifecycle.
Conclusion: The Power of the Right Tool
Phantom Brush is more than just a collection of scary letters; it is a specialized tool for emotional communication. By understanding its "raw, dark" characteristics, you can move beyond simply placing text on a page and start designing experiences. Whether you are crafting a movie poster or a social media campaign, the key is to integrate the font intentionally. Use it to set the scene, control the mood, and ultimately, deliver a project that resonates with the viewer on a visceral level.